Fermented foods are the foundation to a healthy gut and immune system. They give us the beneficial bacteria and yeast our gut needs to stay healthy, let the good stuff in and keep the bad stuff out. A healthy gut enables us to draw in the nutrients our bodies need and prevent viruses, harmful yeast and bacteria to get into our blood stream and make us sick. Continuous brew kombucha is relatively easy to make, does not require a lot of hands on time, and costs pennies.
Kombucha is probably my most favorite fermented “food.” I have posted about the health benefits of kombucha before. (You can read that post here.) I use to buy it for $4 a bottle because I was nervous to make it myself. I didn’t know where to get a SCOBY (Symbiotic Culture of Bacteria and Yeast), how to make it appropriately and prevent mold growth. A friend of mine starting brewing her own, had great results and had SCOBY’s to give away. So we had a sleepover, let our kids play and she walked me through the process.
It is SO simple, tastes amazing and my bank account is a bit fuller. A win all around! I am excited to share this process with you.
How To Make It: Basic Ingredients
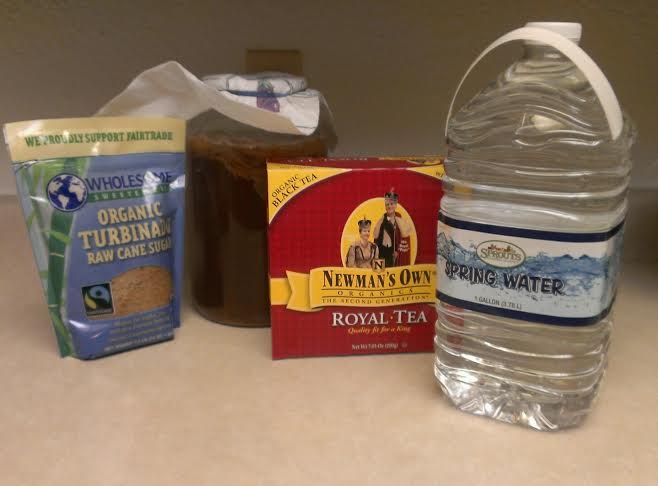
- 1 SCOBY
- 2 cups starter
- 8 bags of black tea (per gallon)
- 1 cup organic sugar (per gallon)
- 6-7 cups filtered water
Supplies
- 1 gallon glass jar (like this
)
- 1 paper towel or woven cloth
- 1 large rubber band (like what they bundle asparagus in)
- 1 medium or large stainless steel pot
- soup ladle
- glass jars with tight lids (like this
)
- Funnel (like this
)
- Large glass bowl
Brewing Directions
- If this is your first time making kombucha, wash out your jar and glass bowl with hot water, soap and a bit of distilled vinegar. Dry completely.
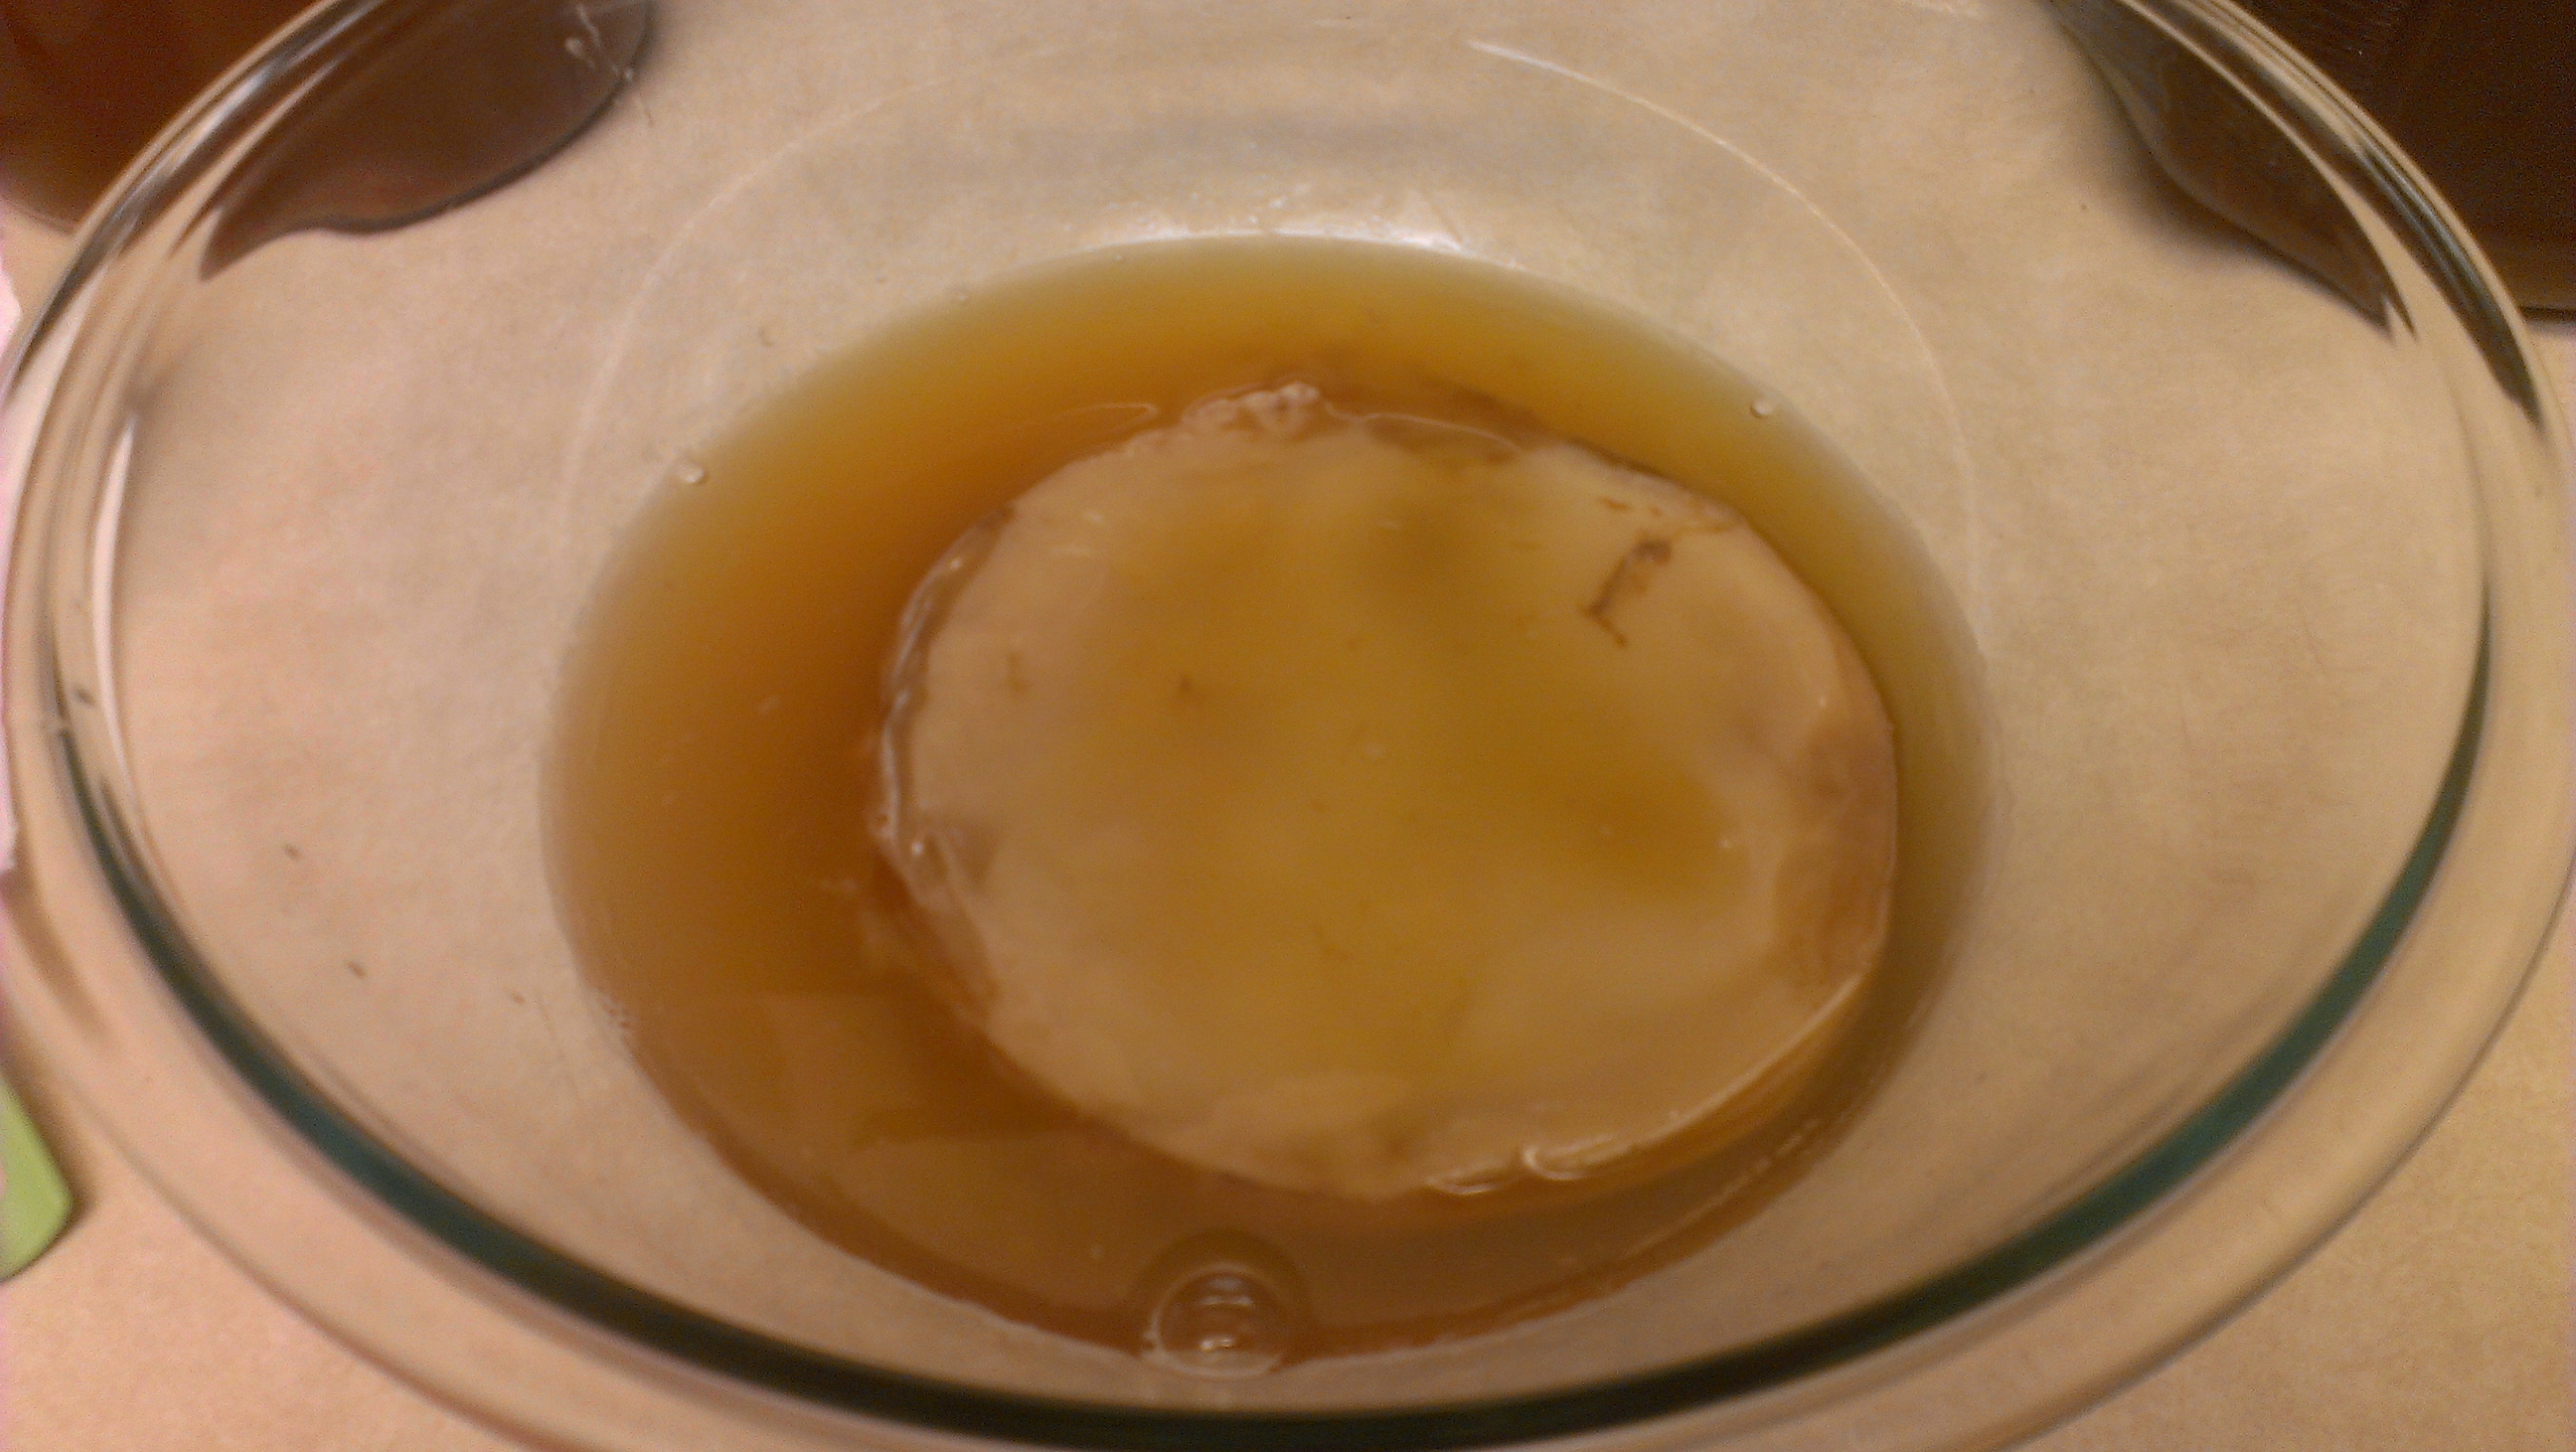
- Place your scoby and starter in the glass bowl and cover with a clean cloth or paper towels.

- Fill pot with 3 cups of water and bring to a rolling boil. Turn off the heat and add in tea and cover with a lid. Let steep for 10 minutes or so. Squeeze out tea bags thoroughly.
- Pour in sugar and stir until it has completely dissolved. Let cool to room temperature. (Do NOT put SCOBY and starter into hot tea. It will kill everything and thus, defeat the purpose.)
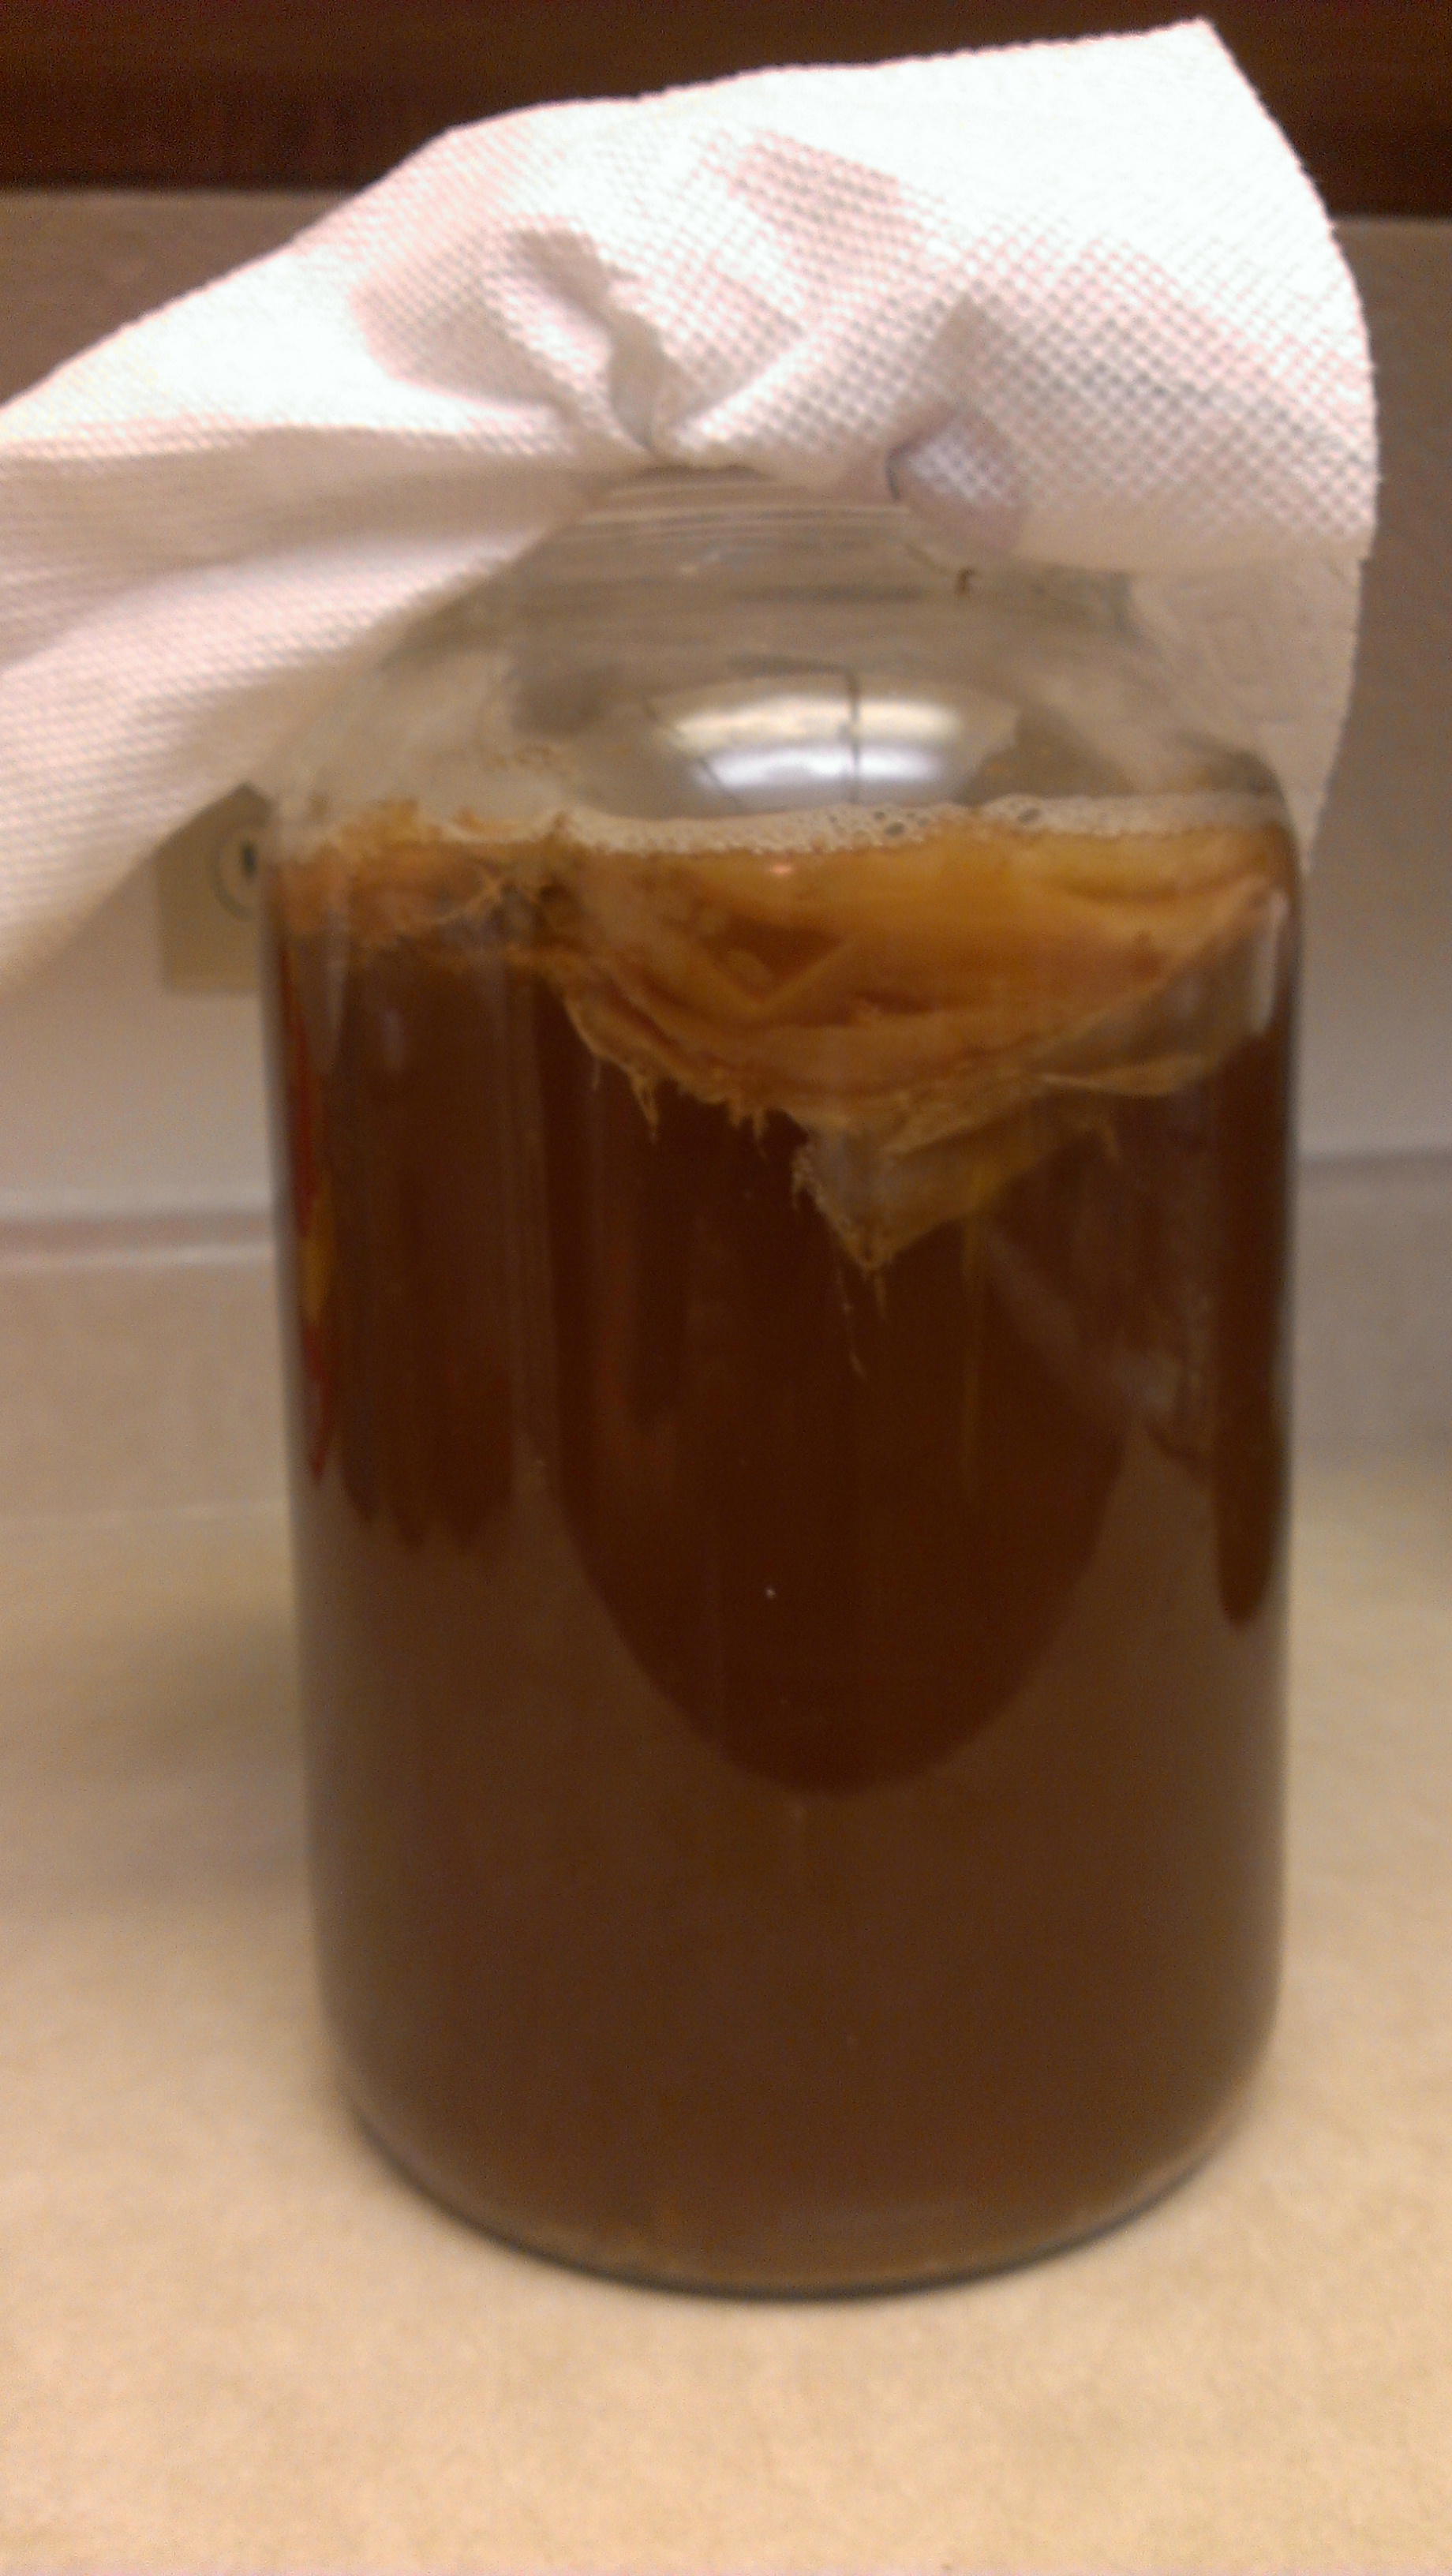
- Pour cooled tea into your gallon jar, then pour in all but two cups of the filtered water.
- Place SCOBY into the jar and add in starter fluid. Cover with paper towel or woven cloth and secure with large rubber band. Place in a dark place where air can circulate like your pantry (in a cupboard the air won’t circulate.)

- Let ferment for 7-10 days with the temperature between 70-80 degrees. (In the winter you will want to place a heating pad next to your bottle. This is a good one.)
Bottling Your Kombucha:
- After you have let it ferment for desired amount of days, clean your glass bowl, funnel and soup ladle extra well with soap, vinegar and hot water. Dry completely.
- Take your bottles and do the same.
- With clean hands, remove SCOBY and 2 cups of starter and place is clean glass bowl. Cover with cloth or clean paper towel.
- Put your funnel in your first bottle and use soup ladle move kombucha from one container to the other.
- Leave at least 1 inch at the top. The gases need room or your bottle will explode.
- When finished, go back to brewing directions. Start the process over again.
Infusing flavor:
After 7-1o days (I prefer 7), you will bottle all but 2 cups of your tea (that 2 cups is the starter.) 1 gallon makes approximately 6 12-14 oz bottles. First place your flavor in the bottom of your bottles, then add kombucha, place on lid and let ferment for 3 more days. After 3 days, place in the fridge to slow fermentation process and enhance flavor. (The longer kombucha sits at room temperature, the more sour it will become. You don’t want to let a batch ferment more than 21 days.)
Flavor options:
Grape: 2 oz (or 1/4 cup) of organic pure (no chemicals allowed) grape juice. (This is our absolute favorite.)
Strawberry: in a 1/2 gallon glass jar, fill will kombucha, then add 6-8 organic strawberries with the tops removed. Let ferment 3 days, remove strawberries, bottle and place in fridge. (This is our second favorite.)
Cranberry: 1 oz (or 1/8 cup) organic pure (no chemicals or sweeteners allowed) of cranberry juice. You can use less if you feel this is too tart.
Mojito: 1 tbsp of organic pure lime juice and 2 mint leaves per bottle. In a separate small glass bowl, place proper amount of lime juice and mint leaves per mojito flavored kombucha you want (Ex. 6 bottles=6 tbsp lime juice and 12 mint leaves.) Let flavors mix for at least 1 hour but you can overnight in the fridge as well. Strain out mint leaves and place 1 tbsp into the bottom of each bottle. Add tea, place on lid. (I LOVED this one, but the kids did not.)
Mango: A similar process as the mango, fill up your half-gallon jar with fermented kombucha. Take 1 mango, remove skin and seed. Put the remaining mango flesh into the tea, cover with a lid and let ferment for 3 days. Remove fruit and place infused tea into your glass containers. Place in the fridge until you are ready to drink.
Black Cherry: 2 oz (or 1/4 cup) organic pure juice (This is our least favorite but some of you might like it.)
A few things to note:
- Your bottles will grow their own small SCOBY’s. It is safe to consume but if they are big, they have the texture of a loogey. (Gross.)
- This beverage is naturally carbonated.
- This is an elixer, not a soda or juice replacement. It is not recommended to drink more than 1-2 bottles per day. (I stick with 1 per day personally.)
- If you have SIBO (small intestinal bacterial overgrowth), this will make you feel worse. Listen to your body, see your doctor and try again one month after treatment is complete.
- Mold can contaminate your SCOBY if it isn’t handled properly. This is EXTREMELY rare, but can happen. If you find mold growing, throw out everything and start over. Do not try to save the batch. For more information about mold growth, please read this.
- My SCOBY splits about every two batches. You can give these away, start another gallon, compost or toss them. To save for others, store in a clean glass container, covered with a cloth or towel in 2 cups of start fluid. Do not give away a dried out or refrigerated SCOBY as they are more likely to grow mold.
- My first batch was not carbonated at all. My second batch was amazing. It’s been great ever since.
Feel free to ask me any and all questions! I love to chat.
Where to get a SCOBY and starter
If you are ready to make your own and do not have a friend to give you a SCOBY, I became an affiliate with Kombucha Kamp.
Directly from Hannah Crum:
“KKamp cultures are commercially grown in organic teas and sugars in sterile conditions. Each Full Size Culture is grown in its own half-gallon jar and harvested only after at least 3 weeks of growth, usually longer. They are freshly packed on the day of the order in very strong starter liquid with yeast strands. Never dehydrated! Never Refrigerated!
Her cultures are then shipped immediately via USPS Priority Mail and guaranteed to brew. They do not sit around in plastic for days or weeks waiting for orders, leeching who knows what. All these factors combine to provide a superior brewing experience to my clients.”
I love her passion and giving you the very best and am excited to be an affiliate to a like-minded company.
Do you brew kombucha and have any tips or flavoring recipes you’d like to share? Please do below!


2 thoughts on “Continous Brew Kombucha Recipe: Basic Elixir Plus Flavor Varieties”
I decided to make my own after a great discussion with Ms. Marian for after my surgery to assist with the flushing of toxins from traditional medicine. My first batch was slightly carbonated and I used granny smith apple concentrate from Sprouts. I also added 2 cups of sugar (raw) v. The one cup (raw sugar), because I wasn’t sure with the taste. After a quick sample, I fell in LOVE because it’s like drinking sparkling apple cider! I will continue with making it because of the benefits AND the taste! Thanks Marian!
I’m so glad you tried it! I’m sure as time goes on you’ll find you need less sugar for it to taste good. Heal quickly!